

how to digitally color a sketch
Tutorial: Digital Color on Traditional Drawing
Over the last few years, I've fallen completely in love with working on toned paper; specifically the Strathmore Toned Tan has become my primary sketchbook of choice. This presented a problem when it came time to throw some digital color on those drawings, though. After some tooling around with a couple of different approaches in Photoshop, I came up with an initial solution. I liked the results enough to keep messing with it, and over the past year of taking commissions in this style and continuing to improve upon it, I've got it broken down to a process well enough to share with you.
A lot of the techniques used in this process are at least in the moderate skill range for Photoshop knowledge, but I've tried to present them in digestible ways, and to always link to break-downs of how each tool functions. So even if you're not familiar with all of them, I hope that through this process you'll get to learn how they work, and perhaps learn enough to utilize them elsewhere in the future.
You could probably take this approach with drawings done on non-toned paper as well (or even digital work), but I've not personally tried it, as this was developed to use the strengths of the toned paper rather than fighting against it. But feel free to borrow what works for you and leave the rest!
A word of advice out of the gate, though: By the time I arrive at this digital coloring stage, 80% of the work is already done. This technique works best with a drawing that feels finished on it's own terms. If your initial drawing is unfinished or uninformed, no amount of digital sparkle will turn it into a better drawing! That said, let's get going on that digital sparkle. ✨
Drawing Prep
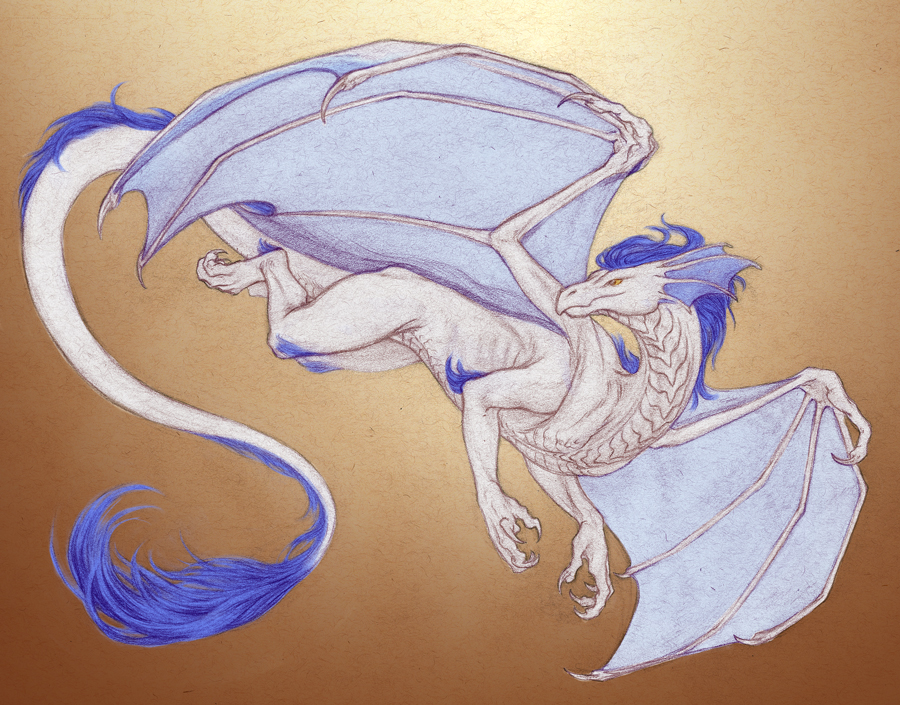
If you haven't already, you'll want to clean up your scan as you normally would, cleaning up any obvious dust, increasing the contrast and tweaking Levels as need be. I like to use Adjustment Layers for those edits, as later in the process it might make sense to adjust this slightly.
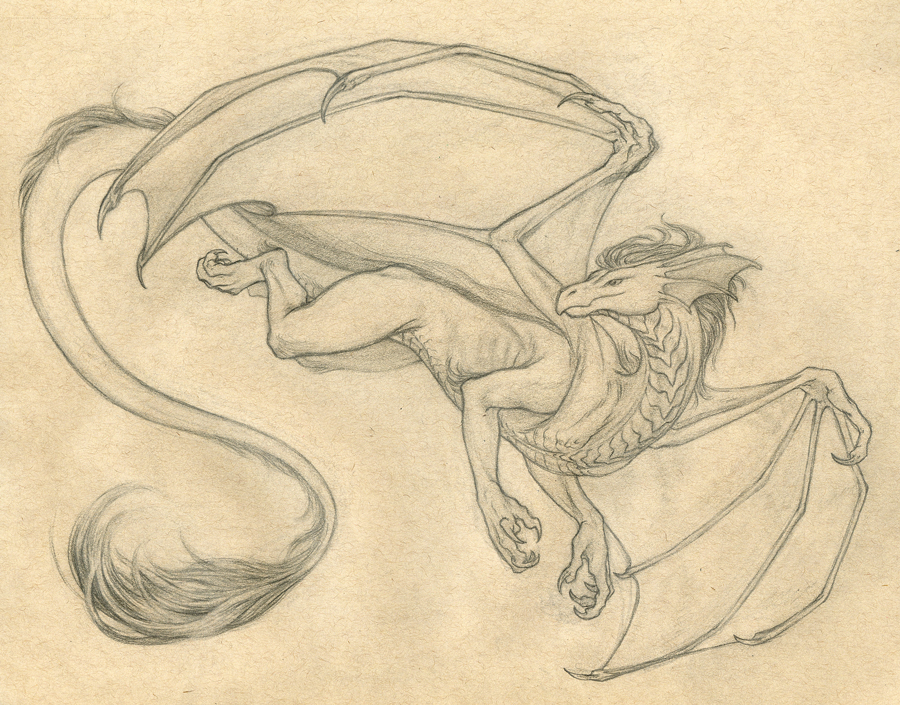
This might look a little blown out right now, but as we work further on the image, the high contrast will help to keep the integrity of the drawing showing through.
Layer Masking
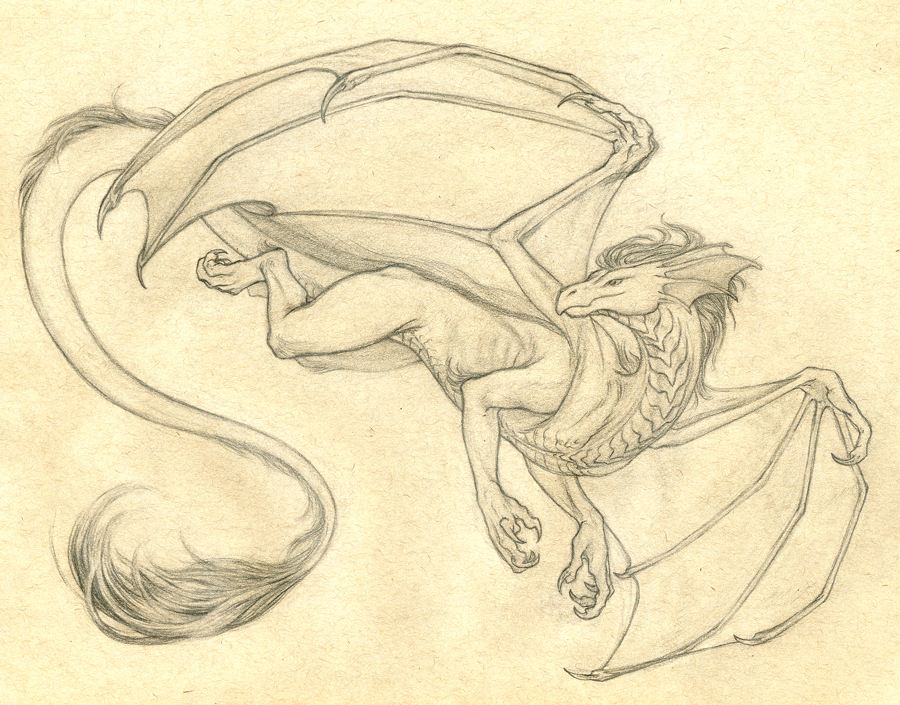
Next, you'll want to get a nice, clean selection of the figure. This will become the foundation of how you build the rest of the color and rendering for the character, so you'll want to take your time with it to avoid having to do more tedious clean up later.
I usually start by creating a new Hue/Saturation Adjustment Layer, setting the saturation to 0, then selecting the layer mask and hitting Ctrl + i for 'invert'. Then paint out the figure; I find this to be the fastest if I use the lasso tool to roughly select the inside of the figure a short ways in from the edge, hit delete to clear that area, then deselect and use a hard round brush to paint in the rest, favoring filling in under the pencil line (as opposed to stopping just shy of it.)
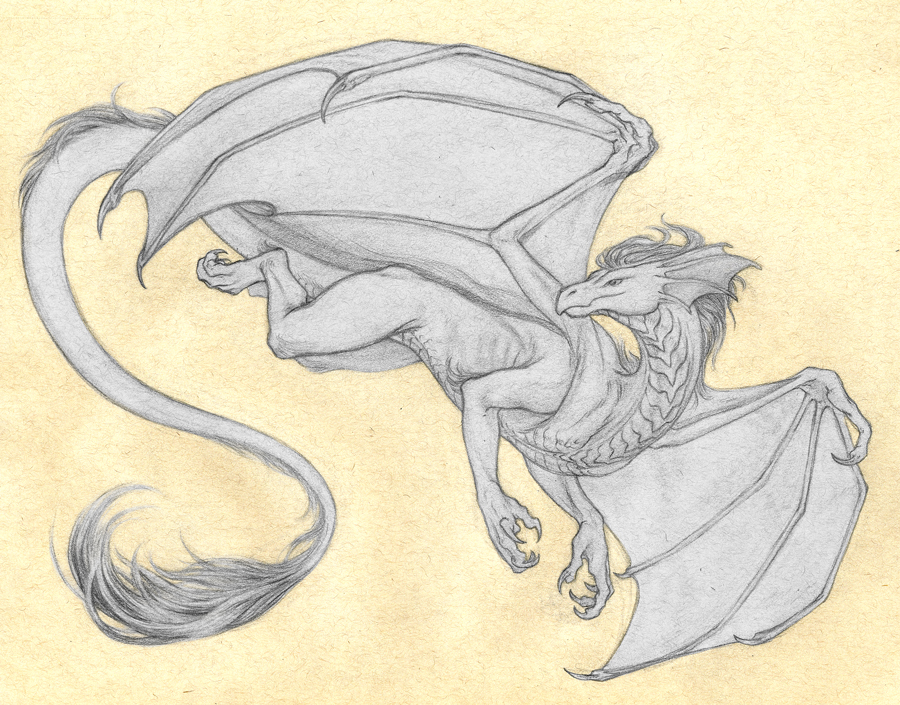
Tinting the Lines
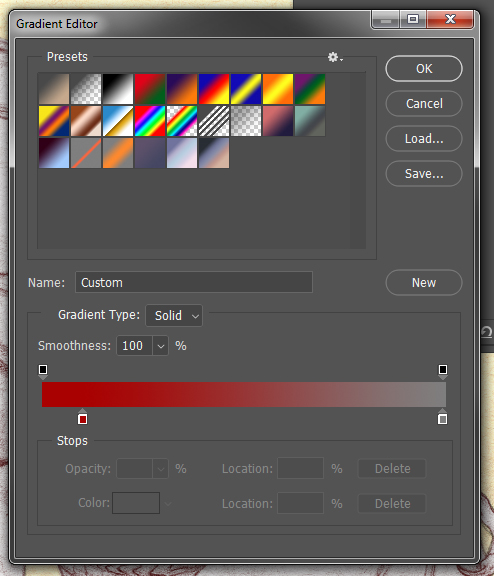
This next step lends some extra life to the base. Create a new Adjustment Layer, this time a Gradient Map, and set the layer blending to 'Soft Light'. Now go into the Gradient Map and set the far right edge (the light end of the value scale) to a desaturated 50% grey. This tells the Soft Light layer to treat this as transparent, so that it doesn't affect the lighter areas. As for the far left, choose a dark, rich color. Since this is an adjustment layer, you can always change it later, but I usually go with something in the range of a dark red, violet, or blue.
I often duplicate this layer and tone back the opacity of the new layer, just to have a bit of extra strength to it.

Background Block-In
Now the selection you created earlier for the figure comes in handy again! Grab a selection of it by holding control and clicking on the thumbnail of the layer mask. Then, hit Ctrl + Shift + i to invert the selection.
At this point you should refine the selection further by doing Select > Modify > Expand. I usually do around 3 - 6 pixels, depending on your file dimensions (I'm working at about 3400 x 2700 pixels.) You can also Feather the selection by one or two pixels if need be.
Now, create a new layer and apply this selection as the layer mask. Now anything you paint onto this layer will only affect the background around the character. Use this stage to throw down some atmosphere around your figure— I like to set the blending mode for this layer to 'Hard Light'. I'll then use the gradient tool to add darker tints in while thinking about how I want to light the piece.
If you're not sure what direction you want to go in, again, don't stress too much at this stage— you can always go back later and tweak this stage as you further figure the piece out!
This is also a stage where I'll often duplicate the layer in order to get a darker, stronger effect out of the blending layer.
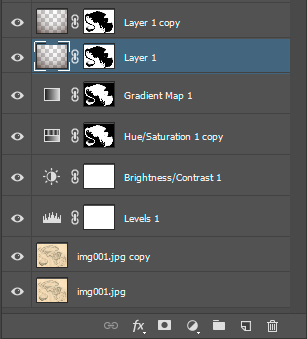
At this point, your layers should look something like the organization shown to the right.

Flat Colors
Alright, now it's time to get into the character! We'll start with flat colors.
Create a new layer, and copy the layer mask over from one of your other character layers. (You can do this quickly by holding Alt and dragging the layer mask thumbnail from one of those earlier layers on to this one.
Set the layer to Hard Light. Here's where all your earlier work on setting up the drawing will come in useful. Remember how Hard Light will act transparent if the color you're painting with is pure 50% grey— and any color you select will act increasingly transparent the closer it is to pure 50% grey. So you likely won't be able to just color pick from a reference sheet, things will take some tweaking to get them to look how you want. So don't be frustrated if coloring flats using Hard Light takes some getting used to!
The benefit of this process is that all of the information in the lower layers will shine through. All of your work on the drawing itself remains strong, and the tint to the lines will lend an inner glow to your rendering, so even at this flat colors stage, you already have some solid vibrancy.
Rendering
Now comes the most time-consuming stage of the coloring process, but also one of the most important.
Once again, you'll create a new layer, set it to hard light, and copy over the character layer mask.
This layer will be just the shadows. I suggest using a color around 20-30% value with a slight tint to it, but that's based on my own habits and style— use whatever suits your own style! You can always adjust this layer as you go, too.
Keeping your light source and it's direction in mind will be the most important part of this stage. In my example piece, I've placed the lighting behind the character, so most of the rendering I had to do was thinking about ambient occlusion and diffuse atmospheric light. If you need a quick refresher on lighting fundamentals, here's a video to check out.
I'd strongly suggest keeping this layer to just the shadows, and save the highlights for our next stage.
If you're having trouble with this type of shading on an isolated layer, here's a preview of what my version of this layer looks like in isolation:

…Including a little error that didn't show up clearly before since I'd never looked at this layer out of context, whoops!
In any case, here I've used both the eraser and just painting with pure neutral grey somewhat interchangeably, depending on what felt the most comfortable at the moment. I also used the lasso tool a number of times in order to isolate certain areas of the piece (notably the wing membranes) to allow me to use large brushes so that I could work efficiently and achieve soft gradations.

Now that you've got the shading worked out, it's time for— you guessed it, a new layer set to hard light with the layer mask copied over!
This one will be your highlights. Generally speaking, this layer will be much more limited than your shading layer, though my image is an extreme example because of where I've placed the light source.

This is also the stage at which I'll create one more character rendering layer— just a regular layer this time! I use this for small opaque edits, usually just strengthening up the eyes or other small but essential details.

Dat Sparkle ✨
Congratulations! The hard work is done and now you get to bring everything together with some finishing touches.
If you don't already have some nice textures to pull from, you'll want to go ahead and get a folder started. I'd suggest Hibbary's free paper textures as a great starting place— that's where mine started over 8 years ago! It's hard to predict what's going to work or not until you try it, so don't be timid— grab some textures and pull them in to your file.
Now you'll want to change the blending mode for this layer— Hard Light is still a good starting place, but I'd suggest just knocking the opacity on the layer down and thumbing through the different layer modes until you see what works or doesn't.
If you like, you can set this layer to being a smart object, if it isn't already— this will allow you to resize it as much as you want without the layer decreasing in quality, so that you can resize it as much as needed to line it up in the best position for your piece.
Some textures will work better than others— usually I have to pull in and discard a few to find the ones that work well. You can also make any number of adjustments to tweak it into meshing better with your piece— If you use adjustment layers and clip them to your texture layer, you can push around the color, contrast, levels, etc to achieve what you need. Don't be afraid to just rotate your texture, as well— sometimes it can drastically change it's effect on the piece.
Lastly, you can summon your layer mask from earlier in the process and apply it to these texture layers to affect the background and character independently. I suggest playing with the contrast on your layer masks here— you can lighten the dark areas to allow some but not all of the texture affect the character, which will help to unite the character to the atmosphere without flattening the image too much. You can also use gradients to create a nice fade in this way, or just manually paint in the areas you do or don't want to affect the character.
Here's what my piece looked like after adding in one texture layer, which I've settled at Hard Light and 51% opacity, with a layer mask that has the character's mask knocked back to a medium grey with some fade on the edges:


Usually, I'll wind up with 2-4 layers using different textures with various blending modes and opacity settings, moving between the layers and making minor adjustments until I'm happy with the results.
To the right are the layers I arrived on as my final settings.

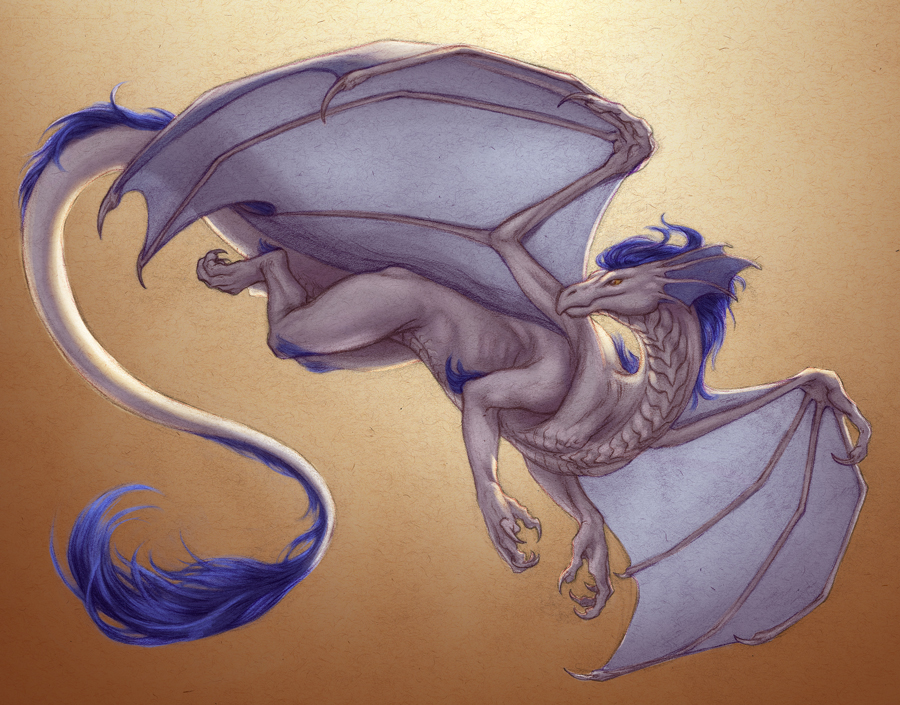
And that's the finished image!
I hope this tutorial has proved useful to you! While this is intensive in the number of steps, once they're familiar, I can get the whole process done in one or two hours after the drawing is done.
If you have any questions about the process or just want to share your own texture file finds, feel free to post in the comments below! If you have any links to your own finished work from using this technique, I'd love to see it!
For those interested, I still offer this technique as a commission option, which you can find more about on my commission page.
Lastly, this tutorial was brought to you by my Patreon. If you found it useful, please consider throwing a couple of bucks my way to support the creation of more new content like this! Thank you so much for making this possible, everyone!
-S
how to digitally color a sketch
Source: https://www.sasharjones.com/blog/2017/2/13/trad-drawing-digital-color
Posted by: buntinthim1975.blogspot.com
0 Response to "how to digitally color a sketch"
Post a Comment